• Welcome to Niffer's
  • About Niffer's
  • Giving Back
  • Blog
  • Contact

Niffer's Blog

Weekday Mash

5/27/2016

1 Comment

 
This week has been a mash of many different beginnings. I feel like not much has found its end or completion, but it still has been a productive week. This past Saturday we received our certificate and our farm is officially registered with the state of Tennessee as Tennessee Farms. The same day I also sent in to register our beehives with the same name. I've been working with my great friend Bob (check him out at Shelley Designs) who is a graphic designer, on our logo for Traditions Farm & Apiary. I can't wait to share it with everyone! It's a new experience for me since I like to create that sort of thing myself. All of the labels and logos for Niffer's I create myself.
Picture
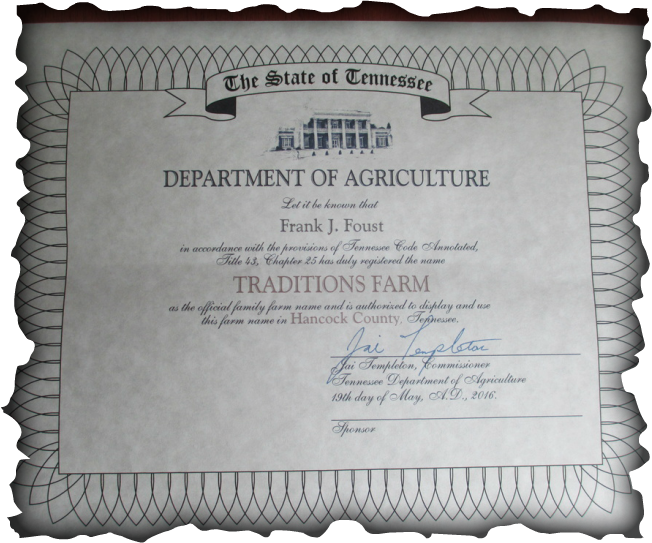
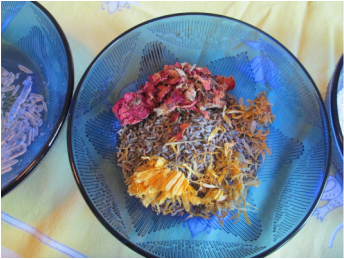
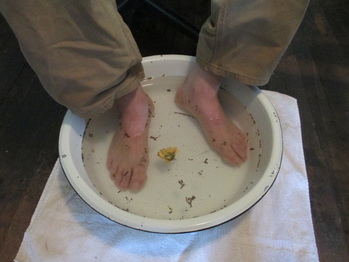
This week I also started working on mixtures for different foot soaks. I want something that I can feel the soothing qualities and is still gentle and safe for sensitive skin. I tested a batch and my hubby tested a batch. Still a little more tweaking, but I think we're almost there. I asked the great world of Facebook what others might prefer, a loose herbal tea like soak you can put in a bag or metal diffuser, already made/disposable tea bags with herbs, or something that will dissolve in the water. So far the majority have said they would prefer a dissolving soak. What's your opinion? I'd love to hear what you would prefer. 
Picture
Picture
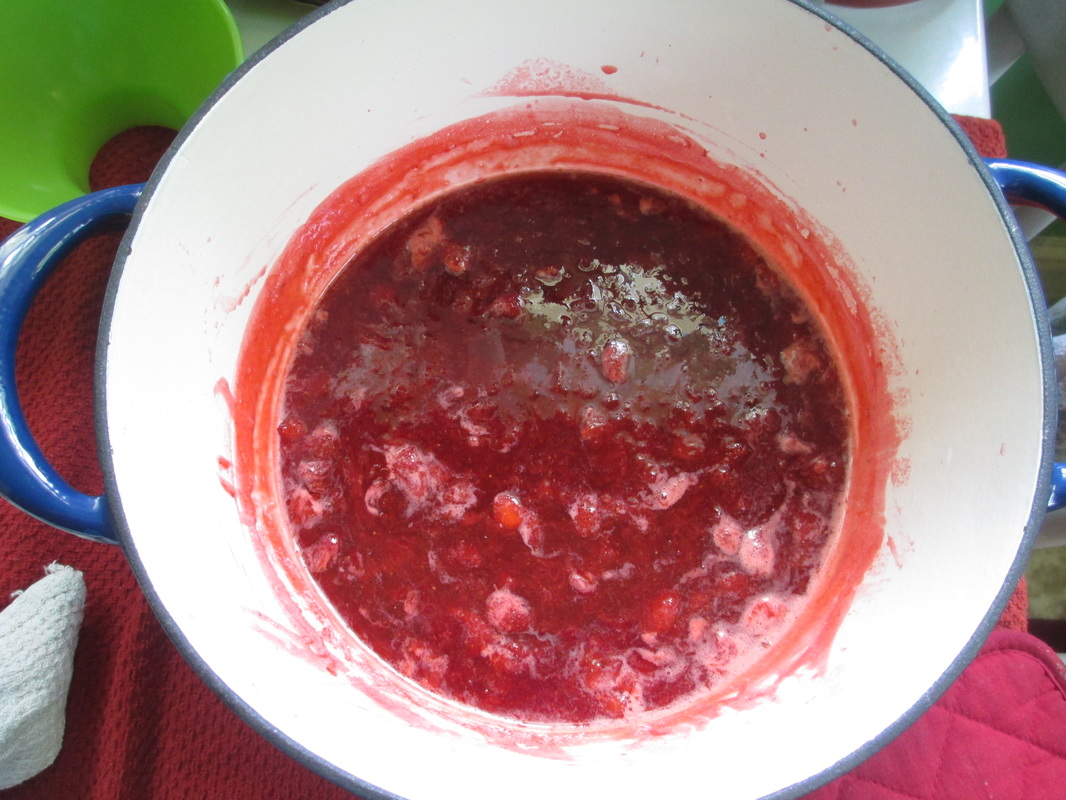
What else have I started this week? I did start and finish my first ever batch of strawberry honey jam. It's really delicious! Our great and wonderful neighbor dropped off some strawberries she grew last weekend, and yesterday I made a pint and a half of jam. Here is a link to the recipe I used: Strawberry Honey Jam
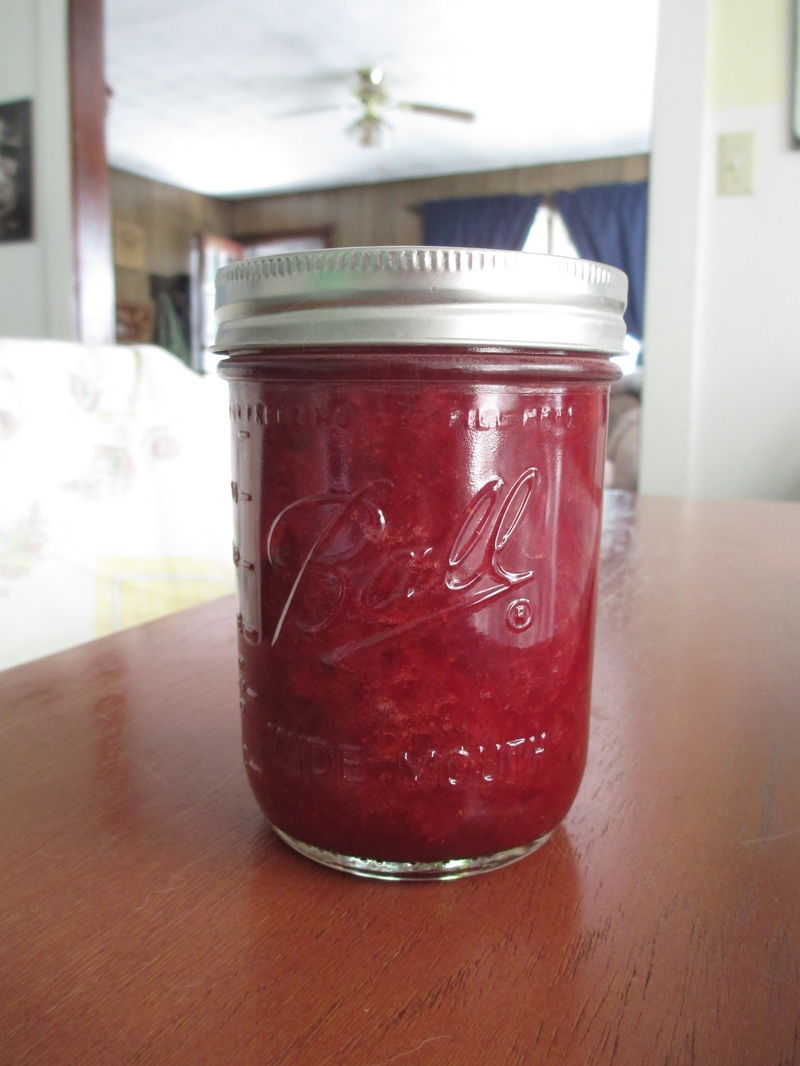
It's delicious and hard not to eat it all. This is the second time I've ever canned anything in a water bath canner. First time was last fall my neighbor Bob and his wife came and helped me can applesauce. I ran low on strawberries so I had to reduce the ingredients accordingly, but it worked out great and is delicious! After it was all said and done, I came out with one single pint that I canned and an extra half pint I stuck in the fridge. It's a great sugar free jam.
 Now that it is Friday, it is a little easier to look back and reflect on the week. I did accomplish a good bit, but I wish I had done more. Isn't that always the way?
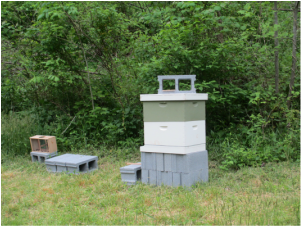
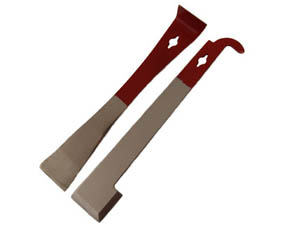
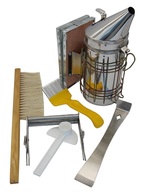
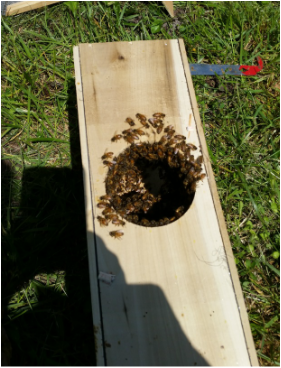
This week I also had another first, I checked on the bees alone. I went up, opened up the hive and pulled frames. I checked them carefully to make sure that the queen was laying eggs. Happily, she is. Which means in about a month we will have more workers to increase population and grow the hive. They have been busy working building comb, and filling it with honey and pollen. Good job ladies!

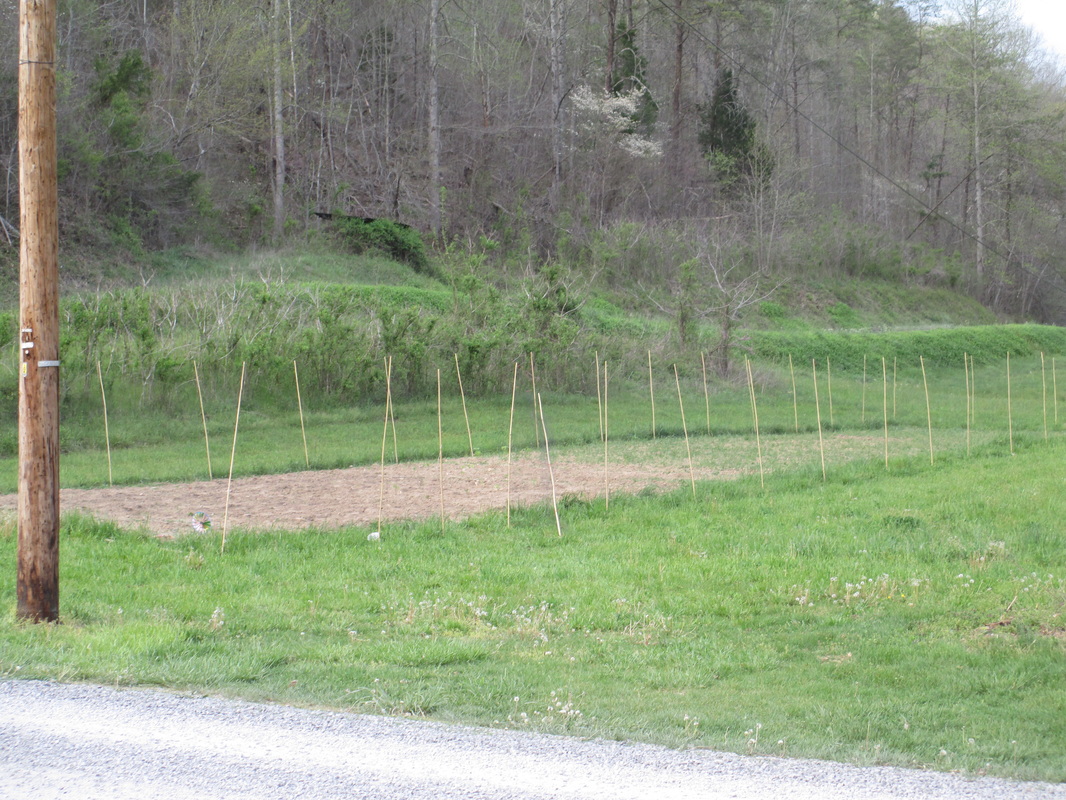
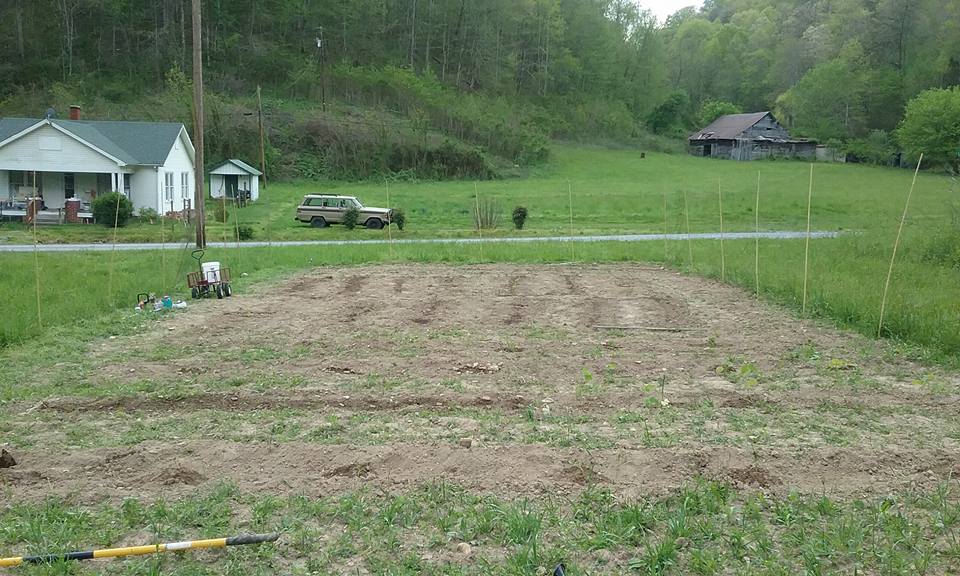
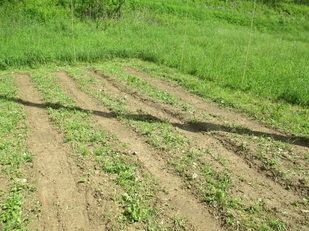
I also worked in the garden a little and planted two more varieties of bush beans, and butternut and acorn squash. When they sprout I will plant more. I hope to have a long harvest so I can put some up, store some for winter, and maybe sell a little bit. I am trying the Florida weave trellis style as well. So far it seems to work very well with the peas and the Jacob's Cattle beans. When I was out in the garden I found 4 tiny baby birds below their nest that was built into the eave of the shed we use for storage and half as a chicken house. I put them back up, but it was so hot that day I think they were jumping out. They all died but one who managed to get into my garden. I haven't checked on him today, but I think he's doing good fending for himself. He's the only bird I'll welcome into my garden for now!

Well, that wraps it up for this week. Hopefully this weekend is productive and next week I can write a little more about what is happening here on the homestead! Before you go, enjoy this little video of me "going for a morning run" with my escape artist chicken. Have a great weekend!
1 Comment

Bee-ginning Beekeepers

5/16/2016

3 Comments

 
Picture
Last week I posted about getting our first bees. Since we are brand new to this I thought it would be fun and informative to make a basic list based off our personal experience of what we needed to get started. There are countless books, websites, videos on YouTube, and local clubs that are overflowing with information. It can be a little overwhelming when you're just starting out. So I'm going to narrow it down to a couple of books and websites that we found helpful as well.

To the left you'll see our one hive. I'll go through how we chose the size, location, and what we needed to get our hive ready for bees.
A little back story, when we moved we knew eventually we would have bees. We have wanted them for years, but never were in a great spot to have them. In the local paper I saw that there was a local bee club that met monthly just a couple miles away. They were having a big open house meeting and were giving away a hive to a new beekeeper.  After spending the day unloading a moving truck with my in-laws my father-in-law and I walked in. I said I was new and they had me fill out some papers. I honestly didn't even know what I was doing. They provided a huge delicious dinner, had a knowledgeable speaker, and then drew names for the hive. I didn't win. I was disappointed. But then they started drawing names for a free package of bees. Guess who won. Guess! Yep, me. I have never won anything before, so I couldn't believe it. So all we had to do was buy a hive and the equipment. The packages of bees were scheduled to be delivered at the end of April so I had about a month to get everything together. So from passive research and reading about bees to full fledged-can't stop now-learning we managed to get everything together.

So here it is, the list I put together that has the bare minimums and basics of what we needed to start and install the first package of bees. Of course, this is only meant to be a helpful guideline from our personal experience, and what you will want or need may differ.
  • A hive
    We opted for a deep box with 10 frames. We put the hive and frames together ourselves. There are countless options online for ordering kits. Some come assembled and others you must assemble them. Personally, I think it's great to start out putting it together. It gives you a great understanding of all the parts that the hive is made of. It's really quite simple, but it is time consuming.
  • Paint
    You need to paint your hives. Painting them protects them from the weather. You only need to paint the outside, and it doesn't matter what color you use. Many people use whatever colors are available in the discounted paints you can find at your local hardware stores. Some say to use acrylic and others say latex paints. The biggest thing to consider is that the paint is for exterior surfaces and will hold up to all seasons of weather.
  • Frames
    Our box holds 10 frames. We used wax foundations with the frames, and we wired them to make them sturdier. You'll need to fill the bottom box of each hive you plan on having, so if you have one box then you will need just enough frames to fill that box. Different size boxes hold different numbers of frames, so you will need to know what size you have.
  • Wire and Eyelets
    If you're using wax foundations in your frames you are probably going to want to use wire to help stabilize them. We bought 100 eyelets and a one pound spool of 26 gauge wire from Mann Lake. The frames will have holes already punched in them for the eyelets, but you will need a few more tools. 
  • Wire Spur Embedder
    This helps push the wire into the wax.
  • A small hammer. Here I will include a picture of what we used. Because not just any hammer will work easily. Preferably an upholstery hammer, but anything small and similar would work.
Picture
I included a quarter in the picture so you could see approximately the size of the hammer head. The reason this hammer worked so well was because of the straight head. Too much arch or a larger tapered head would make it much more difficult to get the nails in where they needed to be.
  • Wire Cutters and Needle Nose Pliers
    Preferably you will need two sets of pliers, and hopefully an extra set of hands for help. The wiring of the frames isn't hard, but it is A LOT easier when you have someone who can help keep the wires tight.
Now that you have your hive together, you will need to find a place to put your hive. You will want an area that gets good morning sun, and if possible shade midday and in the afternoon. Face the front of the hive east or south east if possible. Choose a spot that is well sheltered from strong winds, and not too damp. You don't want your hive to be in a spot where it turns into a pond after every rain. Once you find your location, you need to create a platform for your hive.

We chose a deep box to start with. A deep box is 19-13/16” x16- ¼” x 9-9/16”. Starting with a deep box gives your bees more room for brooding. Second box will be for honey storage. We're thinking of doing another deep for the second box. Then when they're ready for another box we're going to use a medium or shallow box. Medium boxes are 19-13/16” x16-¼” x 6-5/8” and shallows are 19-13/16” x 16-¼” x 5-3/4”. Going for a smaller box on top makes it a lot easier to lift to get the honey extracted.

Placement: we chose an area at the base of the mountain behind our house. It's relatively protected from strong winds and it gets the first sun every morning. By midday it's shaded so the bees will be able to stay cool during the summer months. The entrance is facing a bit southeast. Most of the rain and bad weather comes through the mountains to the north and northwest of us.

When your bees are ready to be placed into their new home, this is what you will need to have ready and available to you:
  • Cinder blocks, bricks, or something to create a platform
    We used 6 cinder blocks, three wide, two high. You need to keep the hive elevated from potential critter predators (like skunks).
  • Sugar water
    You will need to feed your bees. The package comes with a can of syrup, but it is a good idea to have some already made up.
  • Spray Bottle
    Fill with sugar water. Spray your bees when you open the package. It slows them down and keeps them from getting too angry with you.
  • Entrance feeder/Top Feeder
    Depending on which route you want to take, you will need some sort of feeder for your bees. A top feeder goes inside the hive. An entrance feeder is external and has a long spout/trough that goes into the entrance of the hive. We have both on our hive right now. I'd recommend Googling bee feeder and choosing image search. That way you can see all the different kinds you can buy and make at home.
  • Entrance reducer
    This is basically a stick with one side widdled out into a few inch notch and another side with a smaller one inch notch. You can turn the stick to change the size of the entrance. We lost ours somehow. Inside our shed, on a shelf. I think a gnome took it. Our great mentors used some of the handles on the package box as the reducer. So it doesn't have to be fancy. You can even use grass, and just stuff it into the entrance.
  • Veil/Hood/Jacket/Suit
    Whether you are allergic to bees or not (and if you are you should probably not keep bees) you will need to protect at the minimum your face. We got a cheap jacket with attached hood on Amazon.com. It's thin and I don't think it would protect us much, but it does provide a barrier and gives me the illusion that I'm protected. The hood is great and my face is definitely protected. The jacket we purchased was $21.99 with free shipping. Others I have seen have ranged from $15.00 to over $100.00. It's really all about what your budget allows.
  • Gloves
    I wish I would have bought gloves, but both my husband and I aren't fans of gloves and the way they fit. So I opted to wait until I could try some on. The gloves make reaching over to the bees much less scary, so I recommend getting some. Our mentor gave us the great advice to steer clear of the yellow deerskin gloves. He said every time he's tried them they have attacked his hands.
Picture
Picture
  • Hive Tools
    The one we used on Day One looks like a crow bar. We used it to open the package and to move the frames around without having to stick our hands right into puddle of bees. (Yes, puddle. That's what it reminded me of.) We ordered a set of hive tools from Amazon.com for $45.00 and got the crow bar, brush, feeder, smoker, comb, and frame extractor. It took a month to be delivered, so I'd recommend looking at all your options if you plan on ordering online. 
Some other tips based on our first day experience, don't fill the feeders until you are ready to place them in or at your hive. The high sugar content attracts ants and other bugs, and you don't want to introduce your bees to a swarm of ants on their first day. Also, have your hive in place before you show up with bees. You want to keep the stress levels down for both yourself and the bees. When you get to the hive, you want to be able to open the package and get the bees inside immediately. And finally, understand you might get stung. Luckily none of us were stung, but I understood it was a great possibility. Our daughter has been stung before so she knew she didn't want that to happen again. We talked to her many times in the weeks leading up to getting our bees about how to act around the bees. "Be gentle, be calm, be quiet." was what we reminded her. She is four years old and did great and had no problems at all.

So there you have it, that's what we needed the first day. Below you'll find a list of links to websites and books we found helpful. We looked at many, many different books and websites so this isn't intended to be a list of the only places to go for information.

Book: Beekeeper's Guide: Fun and Simple Steps to Apiary Success and Self Sufficiency by Trevor Darby
 This book was an excellent read. Darby writes in a way I found to be fun to read, he has a great sense of humor, but still is full of great information based off experiences. If you have a Kindle you can read this for free with Kindle Unlimited.

Websites:
American Beekeeping Federation
  They have a great page designed to have all the information you need to get started
Brushy Mountain Bee Farm
   Not only are they not too far from us, they sell all you need for bees, but I really appreciate how much they do to help be informational.
Bee Thinking
  Great website packed full of information. I enjoyed the pictures included with the different articles.
Mann Lake Ltd
  We ordered our wire from Mann Lake. They have great prices and videos and links to learn more about beekeeping.

I hope this post will be helpful to someone out there wondering if they should or could become a beekeeper, because YES you can! Thanks for reading! I'd love to hear about your experiences. Comment below and tell us about what helped you get started, and what your first bee installation was like.
3 Comments

Buzz buzz buzz!

5/9/2016

4 Comments

 
We have bees! Hurray!
 After much anticipation the bees were successfully delivered to our local bee club on Saturday. Our mentors came over to help us install the 3 pound package of bees into our hive. The process of installing the bees was much more relaxed and easy than I expected. To be honest, I knew what we were going to do, but in my mind I imagined it somehow being a long and stressful process. Which it wasn't at all. From start to finish I think it took about 20 minutes. The best part was being able to include our 4 year old daughter. We suited her up and she really enjoyed watching and learning. She pointed out the drone bees from the worker bees, and really enjoyed seeing them fly around. She keeps asking if we can go check on them so she can say "Hi." She's a natural beekeeper!

The biggest stumbling block was our mistake and misunderstanding of what we were told we would need to get started. We only had a bottom box, and preferably to install the bees we needed a second box. Our great mentors helped guide us through that flawlessly, and to solve the problem we temporarily removed half the frames in our box and replaced the space with the box the bees came in. The next day our mentor William came to check in and let us borrow a super (that's what the hive boxes are called). We then put the frames back into the bottom brood box (that's what the bottom hive box is called).

Have you ever seen a three pound package of bees? It's really neat. The package is a wooden box with screen/hardware cloth sides. Inside the box are the bees, a smaller box similarly made with the queen, and a large can feeder. Here are a couple pictures--
Picture
Truckload of bees. Our mentors had a busy day ahead of them delivering bees, and helping a handful of others install their bees.
Picture
After removing the top cover over the feeder can and removing the can, the bees were free.
You can watch this really cool video I found on YouTube of an assembly line putting together packages of bees. It gives you a great view into the process and even the size of the box that all the bees come in.


So why are we keeping bees? For a lot of reasons, really. One reason is that the bee population in the world has drastically decreased. Keeping bees can help reduce the loss of bees. Another reason is bees pollinate. Whether the plant is just a flower, a vegetable, or fruit it needs bees to pollinate.  Having bees makes happy pollinated gardens, orchards, and pretty flowers. Also, bees make honey. Honey is delicious. Honey is good for you! There are a lot of medicinal uses for honey and it's a great natural sweetener. You can even make honey wine (mead), which is nice alternative to the traditional bottle of wine for a special occasion. Beeswax is also a wonderful benefit of keeping bees. I use a lot of beeswax in the products I offer (ointment, bug repellent, lavender & tea tree lotion bars, sandalwood lotion bars, lotion in motion, and lip balms). When choosing ingredients for the products I offer I only choose what is clean and natural, and most importantly, safe for most everyone.
  Beeswax offers a great number of benefits, some of which are:
  • Protective: When applied to the skin, beeswax forms a protective barrier while also holding in moisture and reducing dryness. This is one of the reasons beeswax is often used in lip balms. Beeswax doesn’t suffocate the skin, and won’t clog pores.
  • Antibacterial: Beeswax has antibacterial properties just as honey does. This aids in keeping skin clean, and reducing the risks of contamination in the formula itself. In fact, a 2005 study found that a honey/beeswax mixture inhibited the growth of bacteria and fungus, making it a potential treatment for diaper rash and other bacterial skin conditions. You can read about that here!

  • Humectant: When you put it on, you attract water molecules, helping to keep skin hydrated over time. This avoids suffocation or drying, making skin happy!
  • Vitamin A: A good source of this vitamin, beeswax helps support cell turnover and reconstruction.
  • Wound healing: Because of its anti-inflammatory properties, beeswax has been found to help encourage the healing of wounds.
  • Itching: If you suffer from dry skin itching, dermatitis, eczema, or any type of itching related to a skin condition, beeswax is for you. A study published in 2012 found that those patients who suffered serious burns, and later went through “post-burn itch” when the burns were healing, experienced relief with an herbal oil cream and beeswax combination, so much so that they were able to cut back on their use of medications for the itch. Because beeswax is anti-allergenic, it is also easily tolerated by even those with reactive skin. You can also read more about that study here.
  • Candles: Burning beeswax candles are non-toxic when they burn; they don't produce the soot and smoke that other candles do. Beeswax candles also help purify the air because they create negative ions that naturally ionize the air. They also burn brighter and longer than other types of candles.

The benefits are many and I am looking forward to being a good host to our bees. We have, what we hope, is a great location for them. They get the first sun and are protected from most of the wind that can sweep through here pretty harshly. Picking our location was a little difficult. You don't want an area that's too damp, too windy, too sunny, too shady... We're surrounded by three mountains, with many more ridges beyond them. The time we have direct sunlight is limited, and we have countless all-year and seasonal springs, so we have a lot of damp and marshy areas. The spot we chose was at the base of the mountain behind us that gets the first sun. It's the only spot that consistently gets almost the same amount of sunlight in each season. Midday it's shaded slightly by the trees behind it, and it's mostly protected from winds. It's not far from a spring, and during the wetter months it can get kind of soggy not far off. Despite the spring and wetlands, I think they'll be happy.

I am sure I will have many more updates about the bees in the near future. In a few days we'll find out if the queen takes and hopefully it will be smooth sailing from there. Come back soon for another update, and by the end of the week I'm hoping to put together another post that has a list of the minimums that you need to get started as a beekeeper as well as a list of books and other resources we found helpful.

I'd love to hear about your adventures in beekeeping, or any tips you found helpful. Was there something that surprised you when you first started out? Please comment with your stories or pictures! Here's a few pictures I got during the installation.
4 Comments

In the garden

5/4/2016

6 Comments

 
Up until now, right now, this very moment, all of these posts have been copies of the newsletters I send out. I usually try to send a little something once a month, but today I'm trying something different! This might be a long one so grab a cup of coffee and a snack!

Today I want to talk about some of the things going on around the farm. If you've read through the previous posts or the About Niffer's section, you'll know that we recently moved from West Virginia to Tennessee. First, I'd like to say that we LOVE Tennessee. I'm sad it took us so many years to get here. I grew up in West Virginia and I will always be Wild-n-Wonderful (I even have a tattoo to prove it, ha!!), but Tennessee is our perfect match. Is it possible to have a soul state rather than a soul mate?

I think so.

Anyway, we're fresh here and so our farm isn't quite like the bustling farm you'd imagine. But even though we just moved in back in September, we've managed to get along quite nicely. One of our fabulous neighbors tilled up a garden plot for us last fall and again in March. The garden is 28 feet by 128 feet, give or take a few inches.

Picture
Neighbor Bob tilling in the fall. And for you car enthusiasts, yes that's a Grand Wagoneer. It's my baby, I named him Charlie aka Charlie Creeper aka Safari Chuck
Picture
View from the porch. We surrounded the garden with 7 ft deer netting and used bamboo as the posts. So far we haven't had any critter problems. The neighbors all thought we were crazy "city folk" for putting it up. Hopefully it continues to keep deer out.
Picture
The garden has been my biggest focus this spring. Food is important, at least I think so! I really want to succeed and have a fruitful (or vegeful?) garden. I've been spending a lot of my time trying to tackle the weeds to no avail.

One thing I can be thankful for is my bug repellent. I keep it in my pocket and apply as needed. Last week the gnats were fierce. I swiped some onto my bandana, my ears, and the back of my neck to keep them from buzzing around my head. Then I smeared a bit on my ankles to keep the biting bugs away. The lemon eucalyptus oil not only is a great bug repellent in general, but it is also recognized by the CDC as a tick repellent!
My previous experience in gardening has never been anything on this scale. It's really, really overwhelming. I even went as far as to figure the minimum square footage each plant needs and made a two dimensional scale model of each plant and the garden. But what I'm finding is that I can't rely on it totally, and I've been planting every few days as much as I can in that day. I've been planting with companion planting in mind, but I haven't been totally faithful to my model. 
Picture
But even though the model isn't being carried out 100%, it's still nice to reference. I went a little crazy when I ordered seeds. I think I ordered one of everything! After spending weeks carefully planning, reading, weighing pros and cons, I placed my order. Then three days later my neighbor stopped by and dropped off a bunch of seeds, many of which I had already ordered. I can't complain, he's so excited to "see young folks want to work the land" he couldn't help himself and got us some seeds.

But now I have to figure out how to make it all truly fit, without the clean lines of my model.
It's coming together. We don't have any fancy schmancy tools, so the going is slow, and except for Bob's tractor tilling, all the hoeing, rows, planting, etc is done by hand. I have a little more than half the garden planted right now. I should be out there now getting something into the ground, but I have all day, right?
Picture
Last week after weeding, planting sweet potatoes and strawberries, and watering the front rows. These are all rows I did myself.
Picture
This past weekend we planted 4 rows of corn for corn meal. My great and wonderful hubby did all but one row. They're MUCH straighter and uniform than my crazy mess on the other side of the garden.
So far we have two of each 6 different varieties of tomatoes, 3 fatalii peppers, 2  pimentos, 2 pepperoncinis, 2 pineapple tomatillos, lettuce, spinach, beets, 3 different kinds of peas, 6 Jacob's cattle beans, 24 red Mexican beans, 3 zucchini, 3 yellow squash, radishes, Glory of Enkhuizen cabbage, broccoli, artichoke, and Brussels sprouts growing. I'm still impatiently waiting for the cucumbers and corn to sprout. And I still have pole beans and so much more to get into the ground this week. I'm taking it slow though, because while I'm excited to live this life, my body just isn't as eager. The hubby is an over the road truck driver, so the farm is my responsibility all week. I try to get as much done as I can, but I happily accept ALL his help the few hours he gets to be home every weekend.

That's all for today, I better get to work. This Saturday we're scheduled to pick up our first package of bees. So maybe next post will be a buzzing update about them. I'd love to hear back from you! Do you homestead and/or garden? What ways have you used Niffer's All Natural Products to help around your home? I'd love to hear what you're doing or tips and tricks you use in your garden.

Have a great day and enjoy a few pictures from around the farm that I took this morning.
6 Comments
<<Previous

    Author

    Niffer Foust, CEO of Niffer's All Natural Products, Stay at home mom

    Subscribe to our mailing list

    Email Format

    Archives

    November 2018
    August 2017
    June 2017
    May 2017
    April 2017
    January 2017
    September 2016
    July 2016
    June 2016
    May 2016
    March 2016
    August 2015
    January 2015
    October 2014
    September 2014
    August 2014
    July 2014
    June 2014

    Categories

    All
    Around The Farm
    Beekeeping
    Cleaning
    Disaster Relief
    Emails
    Gardening
    Keeping Chickens
    Laundry Powder
    Markets/Events
    New Products
    Newsletter
    Updates

    RSS Feed

  • Welcome to Niffer's
  • About Niffer's
  • Giving Back
  • Blog
  • Contact