• Welcome to Niffer's
  • About Niffer's
  • Giving Back
  • Blog
  • Contact

Niffer's Blog

Get Dirty

6/8/2016

0 Comments

 
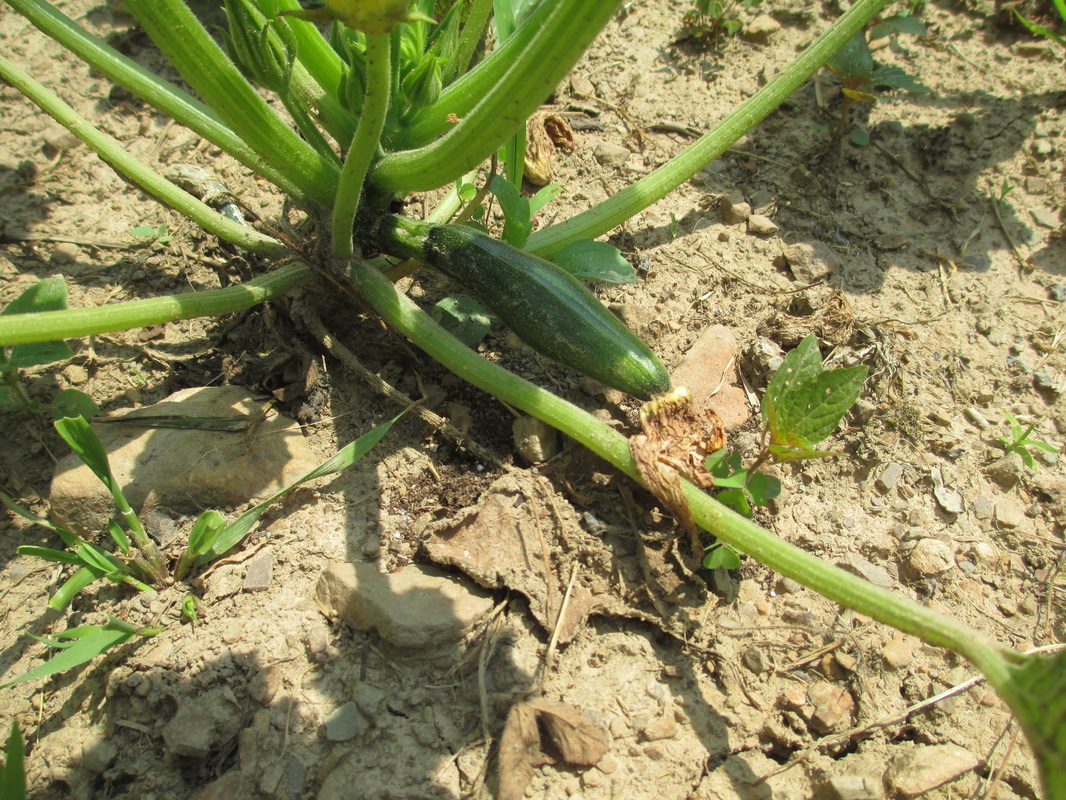
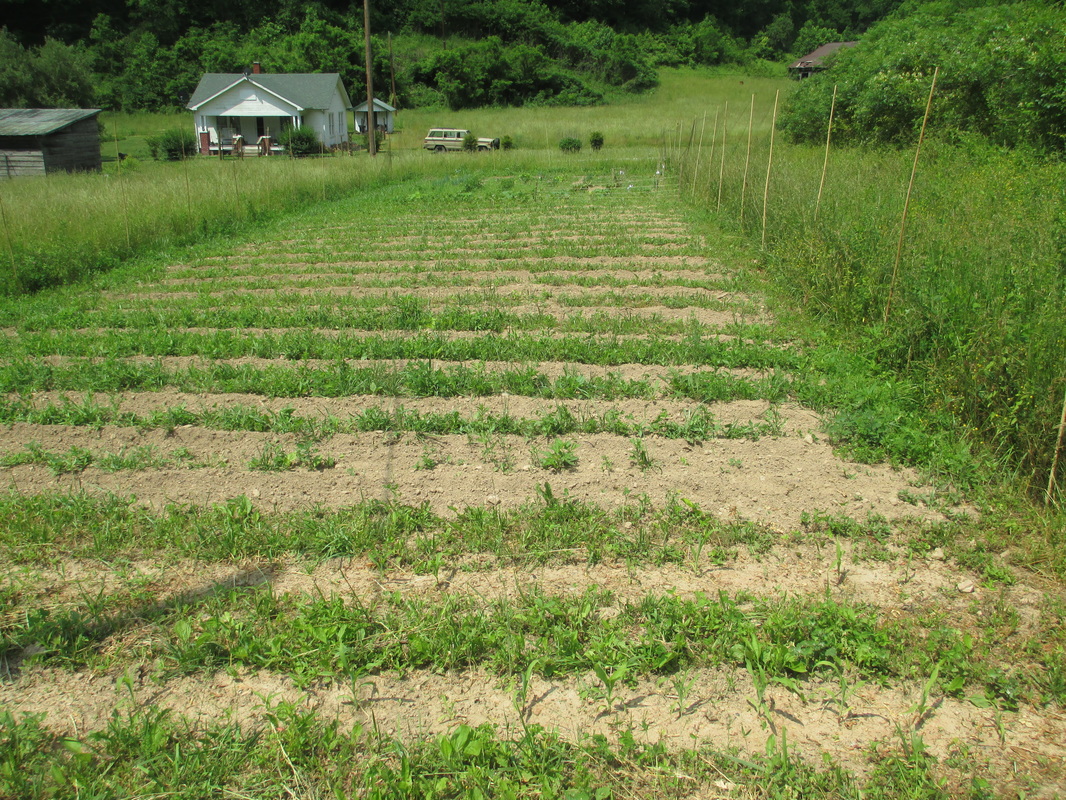
 It's the end of the day, almost, as I write this and I'm pretty tuckered out. It's been a long day of weeding, feeding bees, helping neighbors, cleaning, and making laundry powder. I was up until 2 am last night working on creating a brand new laundry powder. I believe sleep-time will come a bit earlier tonight.

There's another new product coming to the Niffer's family, a borax free, hard water formulated laundry powder. So, today I'm going to talk about laundry powder, why I make it, why you should use it, and why it's better than the stuff you get at the store.

Women have been making soap and laundry scrubbing mixtures for thousands of years. One thing that they all have in common is lye. Traditionally, many women would make their own lye or simply clean using the ash from their fires. When you add a fat, such as lard, or an oil, such as coconut oil, these help clean by attaching to the dirty molecules and lifting them, keeping them suspended in the water- where they can be washed away. I am not a scientist, and I have often been told that I over complicate things when I try to explain anything (just ask my husband!). So, while I would love to give you a complete run down of the workings of soap I will stick with the basics I just gave and give you some links to follow later (at the bottom).

Now, I use a pure coconut oil soap in the formula for my laundry powder. I once offered an "Old Fashioned" recipe using a lard soap, but for some reason I think people didn't like the sound of "lard" because most everyone gravitated towards the coconut oil version. Both work equally well, but the coconut oil is animal product free. Making it cruelty free, and vegan. So, in the end, it was a win-win. This new laundry powder I created still uses the super effective coconut oil soap flakes, but instead of using borax and baking soda (sodium bicarbonate) to lift stains, soften water, and eliminate smells I am using only washing soda (aka soda ash, aka sodium carbonate) along with granulated hydrogen peroxide (sodium percarbonate). Together, the sodium percarbonate, sodium carbonate, coconut oil soap, and essential oils offer you a super natural, all fabric, all colors, all water temperature, safe powder. AND, it is High Efficiency machine safe.

So how do washing soda and sodium percarbonate work? Where does that stuff come from? It sounds scary, it can't be natural, can it? If you're asking yourself those things right now, keep reading because I will be happy to answer those questions!

First we'll cover where the stuff comes from. Sodium carbonate comes from the mineral trona, which 90% is mined in Wyoming, USA. More than half of all trona mined in Wyoming that is processed into sodium carbonate is used in glass making every year. It is also the same mineral that is used to make sodium bicarbonate (baking soda). Sodium carbonate is has a pH of 12, making it highly alkaline which makes it the great laundry booster (especially in hard water). Since it softens water, it helps free the soap molecules in hard water, and increases their effectiveness. This is also why soda ash is used in swimming pool care (it softens water and changes the pH levels).

Sodium percarbonate is essentially granulated hydrogen peroxide. Benefits are that it carries no environmental hazard as it breaks down into oxygen, water, and sodium carbonate. In your laundry, when dissolved into water it brightens colors, deodorizes, and doesn't weaken fabric. It's an effective stain removal in all water temperatures and will not cause yellowing or graying on whites.

So even though sodium carbonate or sodium percarbonate sound a little scary, they are just scientific terms for naturally occurring mineral products. You could basically imagine that together they create a situation in your washing machine where the dirt and smells can't hold on any more and get carried away with the slippery molecules created by the soap. All in all, it's team work (anyone else here Tenacious D fans?!).

So, in conclusion, new laundry powder = awesome happy laundry. That's super scientific, right?
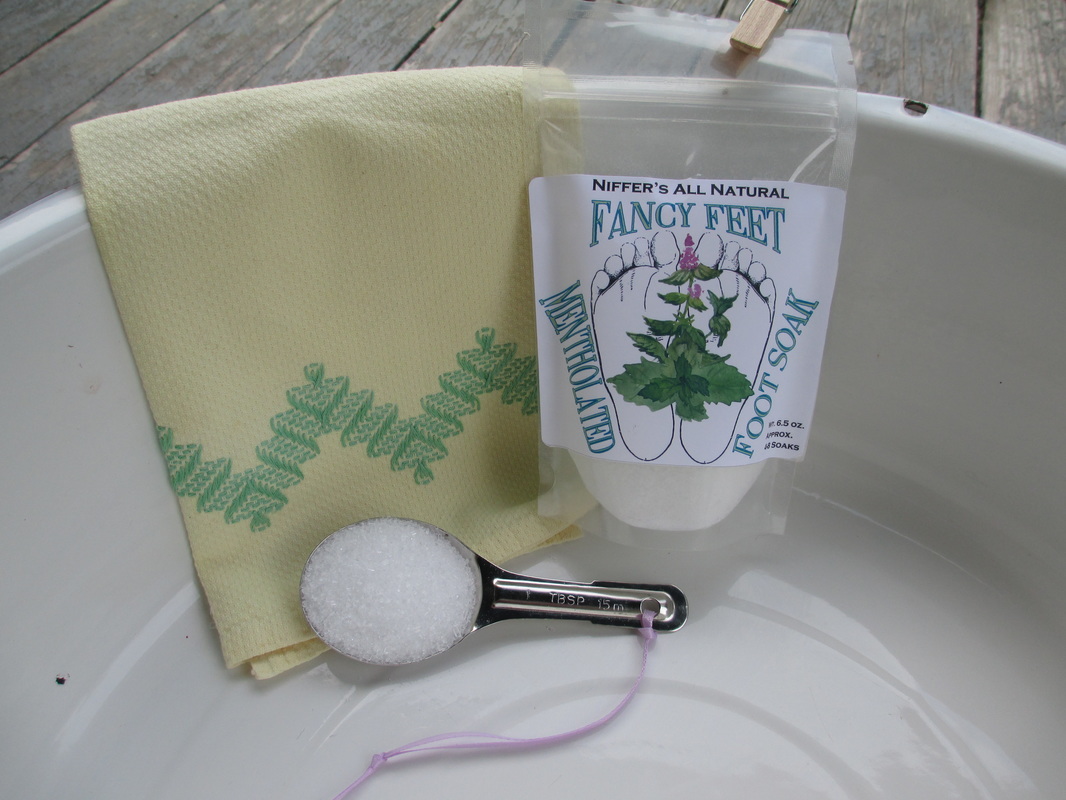
I truly believe in my products and I pour my heart and soul into making them. If you haven't tried Niffer's All Natural Laundry Powder I hope you give it a try. I offer many different sizes and scent options. Scents are only made using essential oils - NOT fragrance oils (we'll go into the differences on that another time). The scents I use are simple, not over powering, and meant to offer extra benefits. Tea tree is added to all of my laundry powder to offer its cleansing and antibacterial benefits. Lavender is added for the awesome scent, calming effects, antimicrobial, and antibacterial properties. Finally, jasmine essential oil is used because it smells so good and it has antiseptic and antidepressent properties.

Store bought laundry detergent and powders are made with toxic chemicals that aren't safe for your clothes, skin, or the environment. The grey water that comes out of your washer isn't toxic to the environment with Niffer's All Natural Laundry Powder. Many older homes do not have their washing machine grey water routed into their septic or city water systems, believe it or not. Instead they are routed just a few yards from the home and drain straight into the ground. Toxic chemicals in typical store bought laundry detergent, softeners, brighteners, and other additives all leave behind chemicals that over time can cause problems to the wildlife around your home. Niffer's All Natural Laundry powder isn't safe to eat and the grey water after use isn't fit for drinking, but it also isn't full of unnatural chemicals that can cause deformities and death in wildlife. Niffer's can go back into nature without causing any harm. Even if your water is routed back to a treatment plant, the chemicals in store bought detergents leave residues on your clothes that are absorbed by your skin. It has been proven in a handful of studies that chemicals from detergents, softeners, and dryer sheets can cause hormonal imbalances, skin irritations, breathing problems, and more. Skip the health risks and go natural with Niffer's!

When you purchase laundry powder I also designate a portion of the profit to funding single load packets of unscented laundry powder that I donate to people in need. You can read more about my disaster relief and other donations here.

Thanks for reading, friends. Get out there, get dirty, and don't feel bad about it. Get your stains and smelly socks clean with Niffer's All Natural Laundry Powder!
I look forward to hearing from you, so please comment your thoughts, questions, or ways you use natural ingredients in your house!

Links for further reading on how soap works:
History of Traditional Soap Making
Planet Science
Chemistry.com
0 Comments

Fancy Feet

6/2/2016

0 Comments

 
This week on the farm I rebuilt the chicken's roosting bars, planted beans, squash, and collards, tilled until my hands bled, and created a brand spankin' new product (the first to be born in TN, awwww)!
I love my chickens. Earlier this year I went through a sort of frenzy and decided we needed chickens, n-o-w. I bought books, asked friends who had chickens, added myself to Facebook chicken groups. I ooo'ed and ahhh'ed over the baby chicks at Tractor Supply and the farmer's co-ops I visited. Then, my neighbor's first eggs hatched. I jumped in the car and brought home two adorable day old babies. We named them Peep and Tom (get it?!).


 Unfortunately, Peep met a sad and unfortunate ending a week later due to a regretful accident between the tiny creature and my daughter's foot. My daughter, who is only four, was heart broken and just sobbed for hours while I called every single co-op/Tractor Supply in the nearby counties, and even looked through Facebook farm groups. Finally, a co-op the next county over had some chicks. We raced down there, and brought home two Easter Egger chicks, Peep II and Woody. My daughter argues they are named Buzz Lightyear, Woody, and Peep II.
We worked diligently on turning the shed/barn across the street into a chicken house. The shed was previously split into two parts, and I thought the smaller side would make the perfect luxury chicken suite. We put up chicken wire and fortified the perimeter. We used a dog kennel to create a large yard, cut a hole in the wall, and added a door. I built a roosting tree, yes a tree, and rigged up three nesting boxes. Then, my neighbor who has a great farm (complete with cows. I want cows!) called and told me they were going to butcher their Rhode Island Reds and if I wanted some of the laying hens, to get my butt over there. So, I went. I came home with four Reds in tote boxes.
The chicks are 13 weeks old now and the pen we made for them was next to the big chickens' yard. They watched the big chickens and every day when I brought them out to their yard and back in at night, they would wiggle and escape to run around the big chickens' yard and pretend to be big chickens. After much debate, I let them move in with the big chickens. But, there was a problem. The roosting tree I made only accommodated four chickens. So, instead of cutting down a tree to make another or buying more wood, we made floating roosting bars from what we had on hand.
Now the chickens are happy, the chicks are happy, and I am happy because I like it when their happy. Happy-go-round.

The garden is growing. Imagine that!? But seriously, I was worried for a little bit. Nothing seemed to want to grow, but now that I'm getting a little better at combating the weeds, and the natural passing of time, the garden is starting to look like a garden. Two weeks ago I was in town on my weekly trip and I came home with a small tiller. Some women want jewelry or clothes for gifts, I prefer tools. So I brought home a tiller and told my husband that he bought me a tiller. We're both happy. It's a tiny little thing, only 10 inches wide, but it works. It beats hand tilling the last 30 feet of the garden. We now have 15 beautifully uniform rows, ready for planting, and I have the energy to plant! We also had our first harvests! Radishes, lettuce, and spinach all were ready for our hungry tummies. The first succession of fall squash was planted, as well as two half rows of beans. The next half I will plant next week. In place of the radishes that were harvested I planted collards. Carrots, spinach, celery, beans, and squash have sprouted this week as well.
After long days in the heat, tilling, and working until my blisters have new blisters, it's nice to find some cooling relief for my feet. Last week I mentioned I was working on a recipe for a foot soak, and many of you said you preferred a fully dissolving formula. I like to please, so you got what you asked for!
Picture
Niffer's All Natural Fancy Feet is a mentholated foot soak, made with Epsom salt, baking soda, menthol crystals, with a blend of peppermint and tea tree essential oils. The menthol and peppermint give cooling relief, the Epsom salt soothes achy muscles, softens skin, eliminates smells, and helps replenish magnesium, a mood-elevating chemical within the brain that creates a feeling of calm and relaxation. Tea tree essential oil is a natural antibacterial agent, and helps get those feet cleaner. Fancy Feet is designed so you can use it in a traditional foot tub/bucket or in a massaging foot bath wit jets. Since it dissolves it won't clog filters or jets! You can order a 6.5 oz. bag of Fancy Feet here! Also, for a limited time, orders $25.00 or more will receive a free bag of Fancy Feet, no coupon necessary. When I receive your order of $25.00 I will automatically add Fancy Feet to your package.

This coming week I plan on working on a new laundry powder formula that will be specifically for hard water! The water here in TN is extremely hard, and while we plan on getting a water softener eventually we have to make do for now. I have been experimenting with different ratios and new ingredients. Hopefully in the next few weeks I will have the formula perfected and then I can share with you all!

Happy homesteading, my friends. Have fun, be safe, and always be all natural! 
0 Comments

Weekday Mash

5/27/2016

1 Comment

 
This week has been a mash of many different beginnings. I feel like not much has found its end or completion, but it still has been a productive week. This past Saturday we received our certificate and our farm is officially registered with the state of Tennessee as Tennessee Farms. The same day I also sent in to register our beehives with the same name. I've been working with my great friend Bob (check him out at Shelley Designs) who is a graphic designer, on our logo for Traditions Farm & Apiary. I can't wait to share it with everyone! It's a new experience for me since I like to create that sort of thing myself. All of the labels and logos for Niffer's I create myself.
Picture
This week I also started working on mixtures for different foot soaks. I want something that I can feel the soothing qualities and is still gentle and safe for sensitive skin. I tested a batch and my hubby tested a batch. Still a little more tweaking, but I think we're almost there. I asked the great world of Facebook what others might prefer, a loose herbal tea like soak you can put in a bag or metal diffuser, already made/disposable tea bags with herbs, or something that will dissolve in the water. So far the majority have said they would prefer a dissolving soak. What's your opinion? I'd love to hear what you would prefer. 
Picture
Picture
What else have I started this week? I did start and finish my first ever batch of strawberry honey jam. It's really delicious! Our great and wonderful neighbor dropped off some strawberries she grew last weekend, and yesterday I made a pint and a half of jam. Here is a link to the recipe I used: Strawberry Honey Jam
It's delicious and hard not to eat it all. This is the second time I've ever canned anything in a water bath canner. First time was last fall my neighbor Bob and his wife came and helped me can applesauce. I ran low on strawberries so I had to reduce the ingredients accordingly, but it worked out great and is delicious! After it was all said and done, I came out with one single pint that I canned and an extra half pint I stuck in the fridge. It's a great sugar free jam.
 Now that it is Friday, it is a little easier to look back and reflect on the week. I did accomplish a good bit, but I wish I had done more. Isn't that always the way?
This week I also had another first, I checked on the bees alone. I went up, opened up the hive and pulled frames. I checked them carefully to make sure that the queen was laying eggs. Happily, she is. Which means in about a month we will have more workers to increase population and grow the hive. They have been busy working building comb, and filling it with honey and pollen. Good job ladies!

I also worked in the garden a little and planted two more varieties of bush beans, and butternut and acorn squash. When they sprout I will plant more. I hope to have a long harvest so I can put some up, store some for winter, and maybe sell a little bit. I am trying the Florida weave trellis style as well. So far it seems to work very well with the peas and the Jacob's Cattle beans. When I was out in the garden I found 4 tiny baby birds below their nest that was built into the eave of the shed we use for storage and half as a chicken house. I put them back up, but it was so hot that day I think they were jumping out. They all died but one who managed to get into my garden. I haven't checked on him today, but I think he's doing good fending for himself. He's the only bird I'll welcome into my garden for now!

Well, that wraps it up for this week. Hopefully this weekend is productive and next week I can write a little more about what is happening here on the homestead! Before you go, enjoy this little video of me "going for a morning run" with my escape artist chicken. Have a great weekend!
1 Comment

Bee-ginning Beekeepers

5/16/2016

2 Comments

 
Picture
Last week I posted about getting our first bees. Since we are brand new to this I thought it would be fun and informative to make a basic list based off our personal experience of what we needed to get started. There are countless books, websites, videos on YouTube, and local clubs that are overflowing with information. It can be a little overwhelming when you're just starting out. So I'm going to narrow it down to a couple of books and websites that we found helpful as well.

To the left you'll see our one hive. I'll go through how we chose the size, location, and what we needed to get our hive ready for bees.
A little back story, when we moved we knew eventually we would have bees. We have wanted them for years, but never were in a great spot to have them. In the local paper I saw that there was a local bee club that met monthly just a couple miles away. They were having a big open house meeting and were giving away a hive to a new beekeeper.  After spending the day unloading a moving truck with my in-laws my father-in-law and I walked in. I said I was new and they had me fill out some papers. I honestly didn't even know what I was doing. They provided a huge delicious dinner, had a knowledgeable speaker, and then drew names for the hive. I didn't win. I was disappointed. But then they started drawing names for a free package of bees. Guess who won. Guess! Yep, me. I have never won anything before, so I couldn't believe it. So all we had to do was buy a hive and the equipment. The packages of bees were scheduled to be delivered at the end of April so I had about a month to get everything together. So from passive research and reading about bees to full fledged-can't stop now-learning we managed to get everything together.

So here it is, the list I put together that has the bare minimums and basics of what we needed to start and install the first package of bees. Of course, this is only meant to be a helpful guideline from our personal experience, and what you will want or need may differ.
  • A hive
    We opted for a deep box with 10 frames. We put the hive and frames together ourselves. There are countless options online for ordering kits. Some come assembled and others you must assemble them. Personally, I think it's great to start out putting it together. It gives you a great understanding of all the parts that the hive is made of. It's really quite simple, but it is time consuming.
  • Paint
    You need to paint your hives. Painting them protects them from the weather. You only need to paint the outside, and it doesn't matter what color you use. Many people use whatever colors are available in the discounted paints you can find at your local hardware stores. Some say to use acrylic and others say latex paints. The biggest thing to consider is that the paint is for exterior surfaces and will hold up to all seasons of weather.
  • Frames
    Our box holds 10 frames. We used wax foundations with the frames, and we wired them to make them sturdier. You'll need to fill the bottom box of each hive you plan on having, so if you have one box then you will need just enough frames to fill that box. Different size boxes hold different numbers of frames, so you will need to know what size you have.
  • Wire and Eyelets
    If you're using wax foundations in your frames you are probably going to want to use wire to help stabilize them. We bought 100 eyelets and a one pound spool of 26 gauge wire from Mann Lake. The frames will have holes already punched in them for the eyelets, but you will need a few more tools. 
  • Wire Spur Embedder
    This helps push the wire into the wax.
  • A small hammer. Here I will include a picture of what we used. Because not just any hammer will work easily. Preferably an upholstery hammer, but anything small and similar would work.
Picture
I included a quarter in the picture so you could see approximately the size of the hammer head. The reason this hammer worked so well was because of the straight head. Too much arch or a larger tapered head would make it much more difficult to get the nails in where they needed to be.
  • Wire Cutters and Needle Nose Pliers
    Preferably you will need two sets of pliers, and hopefully an extra set of hands for help. The wiring of the frames isn't hard, but it is A LOT easier when you have someone who can help keep the wires tight.
Now that you have your hive together, you will need to find a place to put your hive. You will want an area that gets good morning sun, and if possible shade midday and in the afternoon. Face the front of the hive east or south east if possible. Choose a spot that is well sheltered from strong winds, and not too damp. You don't want your hive to be in a spot where it turns into a pond after every rain. Once you find your location, you need to create a platform for your hive.

We chose a deep box to start with. A deep box is 19-13/16” x16- ¼” x 9-9/16”. Starting with a deep box gives your bees more room for brooding. Second box will be for honey storage. We're thinking of doing another deep for the second box. Then when they're ready for another box we're going to use a medium or shallow box. Medium boxes are 19-13/16” x16-¼” x 6-5/8” and shallows are 19-13/16” x 16-¼” x 5-3/4”. Going for a smaller box on top makes it a lot easier to lift to get the honey extracted.

Placement: we chose an area at the base of the mountain behind our house. It's relatively protected from strong winds and it gets the first sun every morning. By midday it's shaded so the bees will be able to stay cool during the summer months. The entrance is facing a bit southeast. Most of the rain and bad weather comes through the mountains to the north and northwest of us.

When your bees are ready to be placed into their new home, this is what you will need to have ready and available to you:
  • Cinder blocks, bricks, or something to create a platform
    We used 6 cinder blocks, three wide, two high. You need to keep the hive elevated from potential critter predators (like skunks).
  • Sugar water
    You will need to feed your bees. The package comes with a can of syrup, but it is a good idea to have some already made up.
  • Spray Bottle
    Fill with sugar water. Spray your bees when you open the package. It slows them down and keeps them from getting too angry with you.
  • Entrance feeder/Top Feeder
    Depending on which route you want to take, you will need some sort of feeder for your bees. A top feeder goes inside the hive. An entrance feeder is external and has a long spout/trough that goes into the entrance of the hive. We have both on our hive right now. I'd recommend Googling bee feeder and choosing image search. That way you can see all the different kinds you can buy and make at home.
  • Entrance reducer
    This is basically a stick with one side widdled out into a few inch notch and another side with a smaller one inch notch. You can turn the stick to change the size of the entrance. We lost ours somehow. Inside our shed, on a shelf. I think a gnome took it. Our great mentors used some of the handles on the package box as the reducer. So it doesn't have to be fancy. You can even use grass, and just stuff it into the entrance.
  • Veil/Hood/Jacket/Suit
    Whether you are allergic to bees or not (and if you are you should probably not keep bees) you will need to protect at the minimum your face. We got a cheap jacket with attached hood on Amazon.com. It's thin and I don't think it would protect us much, but it does provide a barrier and gives me the illusion that I'm protected. The hood is great and my face is definitely protected. The jacket we purchased was $21.99 with free shipping. Others I have seen have ranged from $15.00 to over $100.00. It's really all about what your budget allows.
  • Gloves
    I wish I would have bought gloves, but both my husband and I aren't fans of gloves and the way they fit. So I opted to wait until I could try some on. The gloves make reaching over to the bees much less scary, so I recommend getting some. Our mentor gave us the great advice to steer clear of the yellow deerskin gloves. He said every time he's tried them they have attacked his hands.
Picture
Picture
  • Hive Tools
    The one we used on Day One looks like a crow bar. We used it to open the package and to move the frames around without having to stick our hands right into puddle of bees. (Yes, puddle. That's what it reminded me of.) We ordered a set of hive tools from Amazon.com for $45.00 and got the crow bar, brush, feeder, smoker, comb, and frame extractor. It took a month to be delivered, so I'd recommend looking at all your options if you plan on ordering online. 
Some other tips based on our first day experience, don't fill the feeders until you are ready to place them in or at your hive. The high sugar content attracts ants and other bugs, and you don't want to introduce your bees to a swarm of ants on their first day. Also, have your hive in place before you show up with bees. You want to keep the stress levels down for both yourself and the bees. When you get to the hive, you want to be able to open the package and get the bees inside immediately. And finally, understand you might get stung. Luckily none of us were stung, but I understood it was a great possibility. Our daughter has been stung before so she knew she didn't want that to happen again. We talked to her many times in the weeks leading up to getting our bees about how to act around the bees. "Be gentle, be calm, be quiet." was what we reminded her. She is four years old and did great and had no problems at all.

So there you have it, that's what we needed the first day. Below you'll find a list of links to websites and books we found helpful. We looked at many, many different books and websites so this isn't intended to be a list of the only places to go for information.

Book: Beekeeper's Guide: Fun and Simple Steps to Apiary Success and Self Sufficiency by Trevor Darby
 This book was an excellent read. Darby writes in a way I found to be fun to read, he has a great sense of humor, but still is full of great information based off experiences. If you have a Kindle you can read this for free with Kindle Unlimited.

Websites:
American Beekeeping Federation
  They have a great page designed to have all the information you need to get started
Brushy Mountain Bee Farm
   Not only are they not too far from us, they sell all you need for bees, but I really appreciate how much they do to help be informational.
Bee Thinking
  Great website packed full of information. I enjoyed the pictures included with the different articles.
Mann Lake Ltd
  We ordered our wire from Mann Lake. They have great prices and videos and links to learn more about beekeeping.

I hope this post will be helpful to someone out there wondering if they should or could become a beekeeper, because YES you can! Thanks for reading! I'd love to hear about your experiences. Comment below and tell us about what helped you get started, and what your first bee installation was like.
2 Comments
<<Previous
Forward>>

    Author

    Niffer Foust, CEO of Niffer's All Natural Products, Stay at home mom

    Subscribe to our mailing list

    Email Format

    Archives

    November 2018
    August 2017
    June 2017
    May 2017
    April 2017
    January 2017
    September 2016
    July 2016
    June 2016
    May 2016
    March 2016
    August 2015
    January 2015
    October 2014
    September 2014
    August 2014
    July 2014
    June 2014

    Categories

    All
    Around The Farm
    Beekeeping
    Cleaning
    Disaster Relief
    Emails
    Gardening
    Keeping Chickens
    Laundry Powder
    Markets/Events
    New Products
    Newsletter
    Updates

    RSS Feed

  • Welcome to Niffer's
  • About Niffer's
  • Giving Back
  • Blog
  • Contact